Skip to product information

💝 TODAY ONLY — 50% OFF 💝Concealer Pen – Brightening, Correcting & Long-Lasting

💝 TODAY ONLY — 50% OFF 💝Concealer Pen – Brightening, Correcting & Long-Lasting

Excellent 4.9
2,544 Reviews
Trustpilot
3,000+ orders shipped
Based on fulfilled orders.
Technical support provider: Created with Sketch.
💝 TODAY ONLY — 50% OFF 💝Concealer Pen – Brightening, Correcting & Long-Lasting

💝 TODAY ONLY — 50% OFF 💝Concealer Pen – Brightening, Correcting & Long-Lasting

Regular price $247.90
Regular price $247.90 Sale price $959.59
SAVE 74% Sold out
Buy 1 Get 1 Free Offer ends at midnight
23 Hours
:
59 Mins
:
59 Secs

View full details
    Precision Concealer Pen

    Targeted coverage · skin-like finish

    Fresh-looking coverage, exactly where you want it.

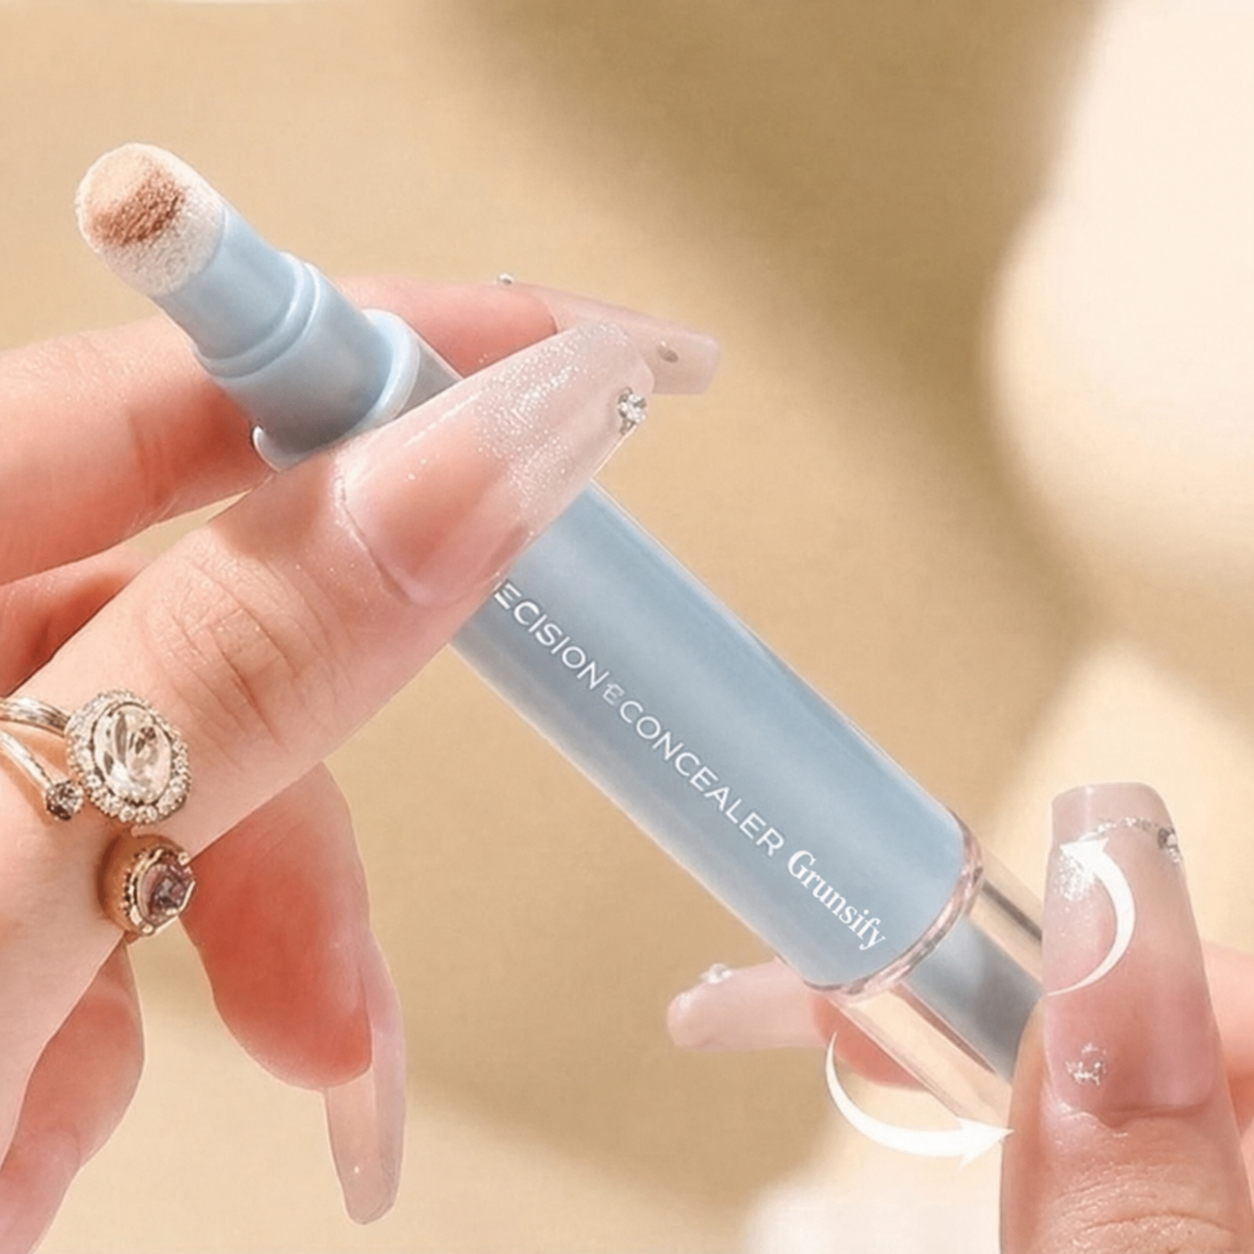
    A compact concealer pen made for under-eyes, redness and everyday imperfections. Apply a little, blend it in, and keep the finish looking light—not mask-like.

    Brightens tired-looking areas Use targeted coverage around the under-eyes and center of the face.
    Soft sponge-tip applicator Designed for quick, controlled application without a separate brush.
    Lightweight everyday finish Build only where you need it instead of covering the whole face.
    Made for quick touch-ups A compact pen format that fits easily into a makeup bag.
    Concealer pen product and application
    Targeted concealer use for under eyes, redness and blemishes

    Made for real-life touch-ups

    Cover what you want. Keep the rest looking like skin.

    Instead of applying a heavy layer everywhere, place small amounts only on the areas that need extra help.

    Tired-looking under-eyes

    Add a small amount beneath the eyes, then tap gently to soften the look of darkness.

    Redness & uneven-looking tone

    Use precise dots around the nose, cheeks or other areas where you want more even-looking coverage.

    Small blemishes & quick corrections

    Target individual spots without turning your everyday makeup into a full-coverage routine.

    Before & after

    Coverage that still looks natural.

    Drag the slider to compare. For trustworthy results, use your own unretouched images photographed in the same lighting and angle.

    Before applying concealer Before
    After applying concealer After

    Cosmetic appearance varies by person, shade match, application amount and lighting.

    Why this format

    Targeted coverage without the heavy routine.

    The value is not “more makeup.” It is having a faster way to place coverage only where it is needed.

    What matters Precision pen Heavy all-over concealer
    Targeted application ×
    Built-in applicator
    Easy to carry for touch-ups
    Lets you build only where needed
    Designed for a lighter-looking routine ×

    How to use

    Twist. Dot. Blend.

    Start with less than you think you need. You can always build another thin layer.

    Twist concealer pen to dispense product
    1

    Twist

    Turn the pen gradually until a small amount reaches the applicator.

    Dot concealer on areas that need coverage
    2

    Dot

    Place a few small dots on under-eyes, redness or individual imperfections.

    Blend concealer gently for a natural finish
    3

    Blend

    Tap gently until the edges disappear into the surrounding skin, then add more only if needed.

    Shade guide

    Three shades. Three easy starting points.

    Use this as a simple guide, then confirm the closest match against your own skin tone and undertone.

    Three concealer shades and swatches
    01 · Creamy White

    A brightening option generally suited to fair-to-light complexions and tired-looking under-eye areas.

    02 · Creamy Beige Pink

    A soft pink-toned option for light to light-medium complexions when the goal is to freshen dull-looking areas.

    03 · Rice Beige

    A warmer beige option for medium-to-tan complexions and targeted coverage over redness or blemishes.

    Designed for quick application

    A soft applicator built into the pen.

    The sponge-style tip keeps the application focused, while the slim format makes it practical for a desk drawer, makeup bag or travel pouch.

    Precise placement Apply directly to smaller areas instead of covering the entire face.
    No separate brush required The built-in tip helps simplify fast touch-ups.
    Buildable routine Start light, blend, then add only where you want more coverage.
    Compact format Easy to keep nearby for workdays, travel and last-minute plans.
    Close-up of concealer pen sponge tip

    FAQ

    Quick answers before you apply.

    Keep the routine simple: use a small amount, blend the edges and build only where you need more coverage.

    Will it look heavy under my eyes?
    The pen is designed for targeted, thin layers. For the lightest-looking finish, begin with a very small amount, tap gently and add another layer only if needed.
    Where can I use it?
    Use it on cosmetic areas where you want more even-looking coverage, such as under-eyes, redness around the nose, small blemishes or uneven-looking spots.
    Do I need a separate brush or sponge?
    A separate brush is not required for placement because the pen has a built-in soft applicator. You can finish by gently tapping with a clean fingertip if that is your preferred technique.
    Is it suitable for quick touch-ups?
    Yes—the slim pen format is intended to be easy to carry and to make small, targeted corrections without redoing a full face of makeup.
    How do I choose a shade?
    Use the shade guide above as a starting point and choose the option closest to your skin tone and intended use. Lighting, undertone and the amount applied can change how a shade appears.
    How should I use it the first time?
    Twist gradually, wait for a small amount to reach the tip, dot the product only where needed and blend. Avoid dispensing too much at once. Discontinue use if irritation occurs.
    Cosmetic product only. Results and appearance may vary by skin tone, application method, shade match and lighting.